
I don’t think I know anyone who doesn’t love Nutella, the sweet chocolate-hazelnut spread that’s good on everything. This recipe for Nutella Ice Cream foregoes the processed, ultra-sweet spread for a combination of hazelnuts, 2 types of chocolate, and coconut milk. It comes together easily in a food processor to make a delicious, vegan version. Nutella Ice Cream is especially great when topped with roasted, chopped hazelnuts and homemade chocolate Magic Shell.

Ingredient notes
For the chocolate: We’re using 2 types of chocolate. First, basic cocoa powder. Second, a solid chocolate of your choice that gets melted before blending with the other ingredients. I use 70-75% dark chocolate chips, but if you’d like something sweeter, go with milk chocolate.
For the hazelnuts: Try to find nuts that are already roasted and chopped. This is how I tested the recipe and measured the nuts. If you can only find raw hazelnuts, you’ll want to toast them — it really adds to the flavor. I like to toast nuts in my air fryer. Usually it takes about 4 minutes at 350, but your experience may vary. If your nuts are whole, they won’t measure the same as my chopped nuts by volume, but you can still weigh them to get the correct amount.

Process notes
Nuts and nut butters are God’s gift to vegan ice cream. They provide wonderful flavor, a source of healthy non-dairy fats, and are extremely versatile in their flavor combinations. On the technical side, the particles of nuts prevent small ice crystals from recombining and growing larger, keeping the texture creamy instead of icy. However, nuts require a food processor or blender to get them smooth and creamy.
The key to making great ice cream from nuts is to make sure the nuts are blended until they’re almost completely smooth before adding any liquid. This may take several minutes of blending. The nuts are ground first. Then dry ingredients are added. Liquid is added very slowly at the end. Adding too much liquid too soon will make it very difficult to get the nuts completely smooth. Step-by-step instructions are in the recipe below, but for more details, check out the post for Pistachio Ice Cream. Also check out this great video from Sohla El-Waylly about making nut butters.
You might also like…
…these vegan chocolate ice cream recipes:
…or these vegan ice cream recipes based on nut and seed butters:
- Espresso-Tahini Ice Cream (vegan)
- Peanut Butter-Carob Ice Cream (vegan)
- Walnut-Coconut Ice Cream (vegan)
- Apricot-Pine Nut Ice Cream (vegan)
- Pistachio Ice Cream with White Chocolate (vegan)
Nutella Ice Cream (chocolate-hazelnut) (vegan)
Makes a little less than 1 quart
Ingredients
Instructions
-
START GRINDING THE NUTS
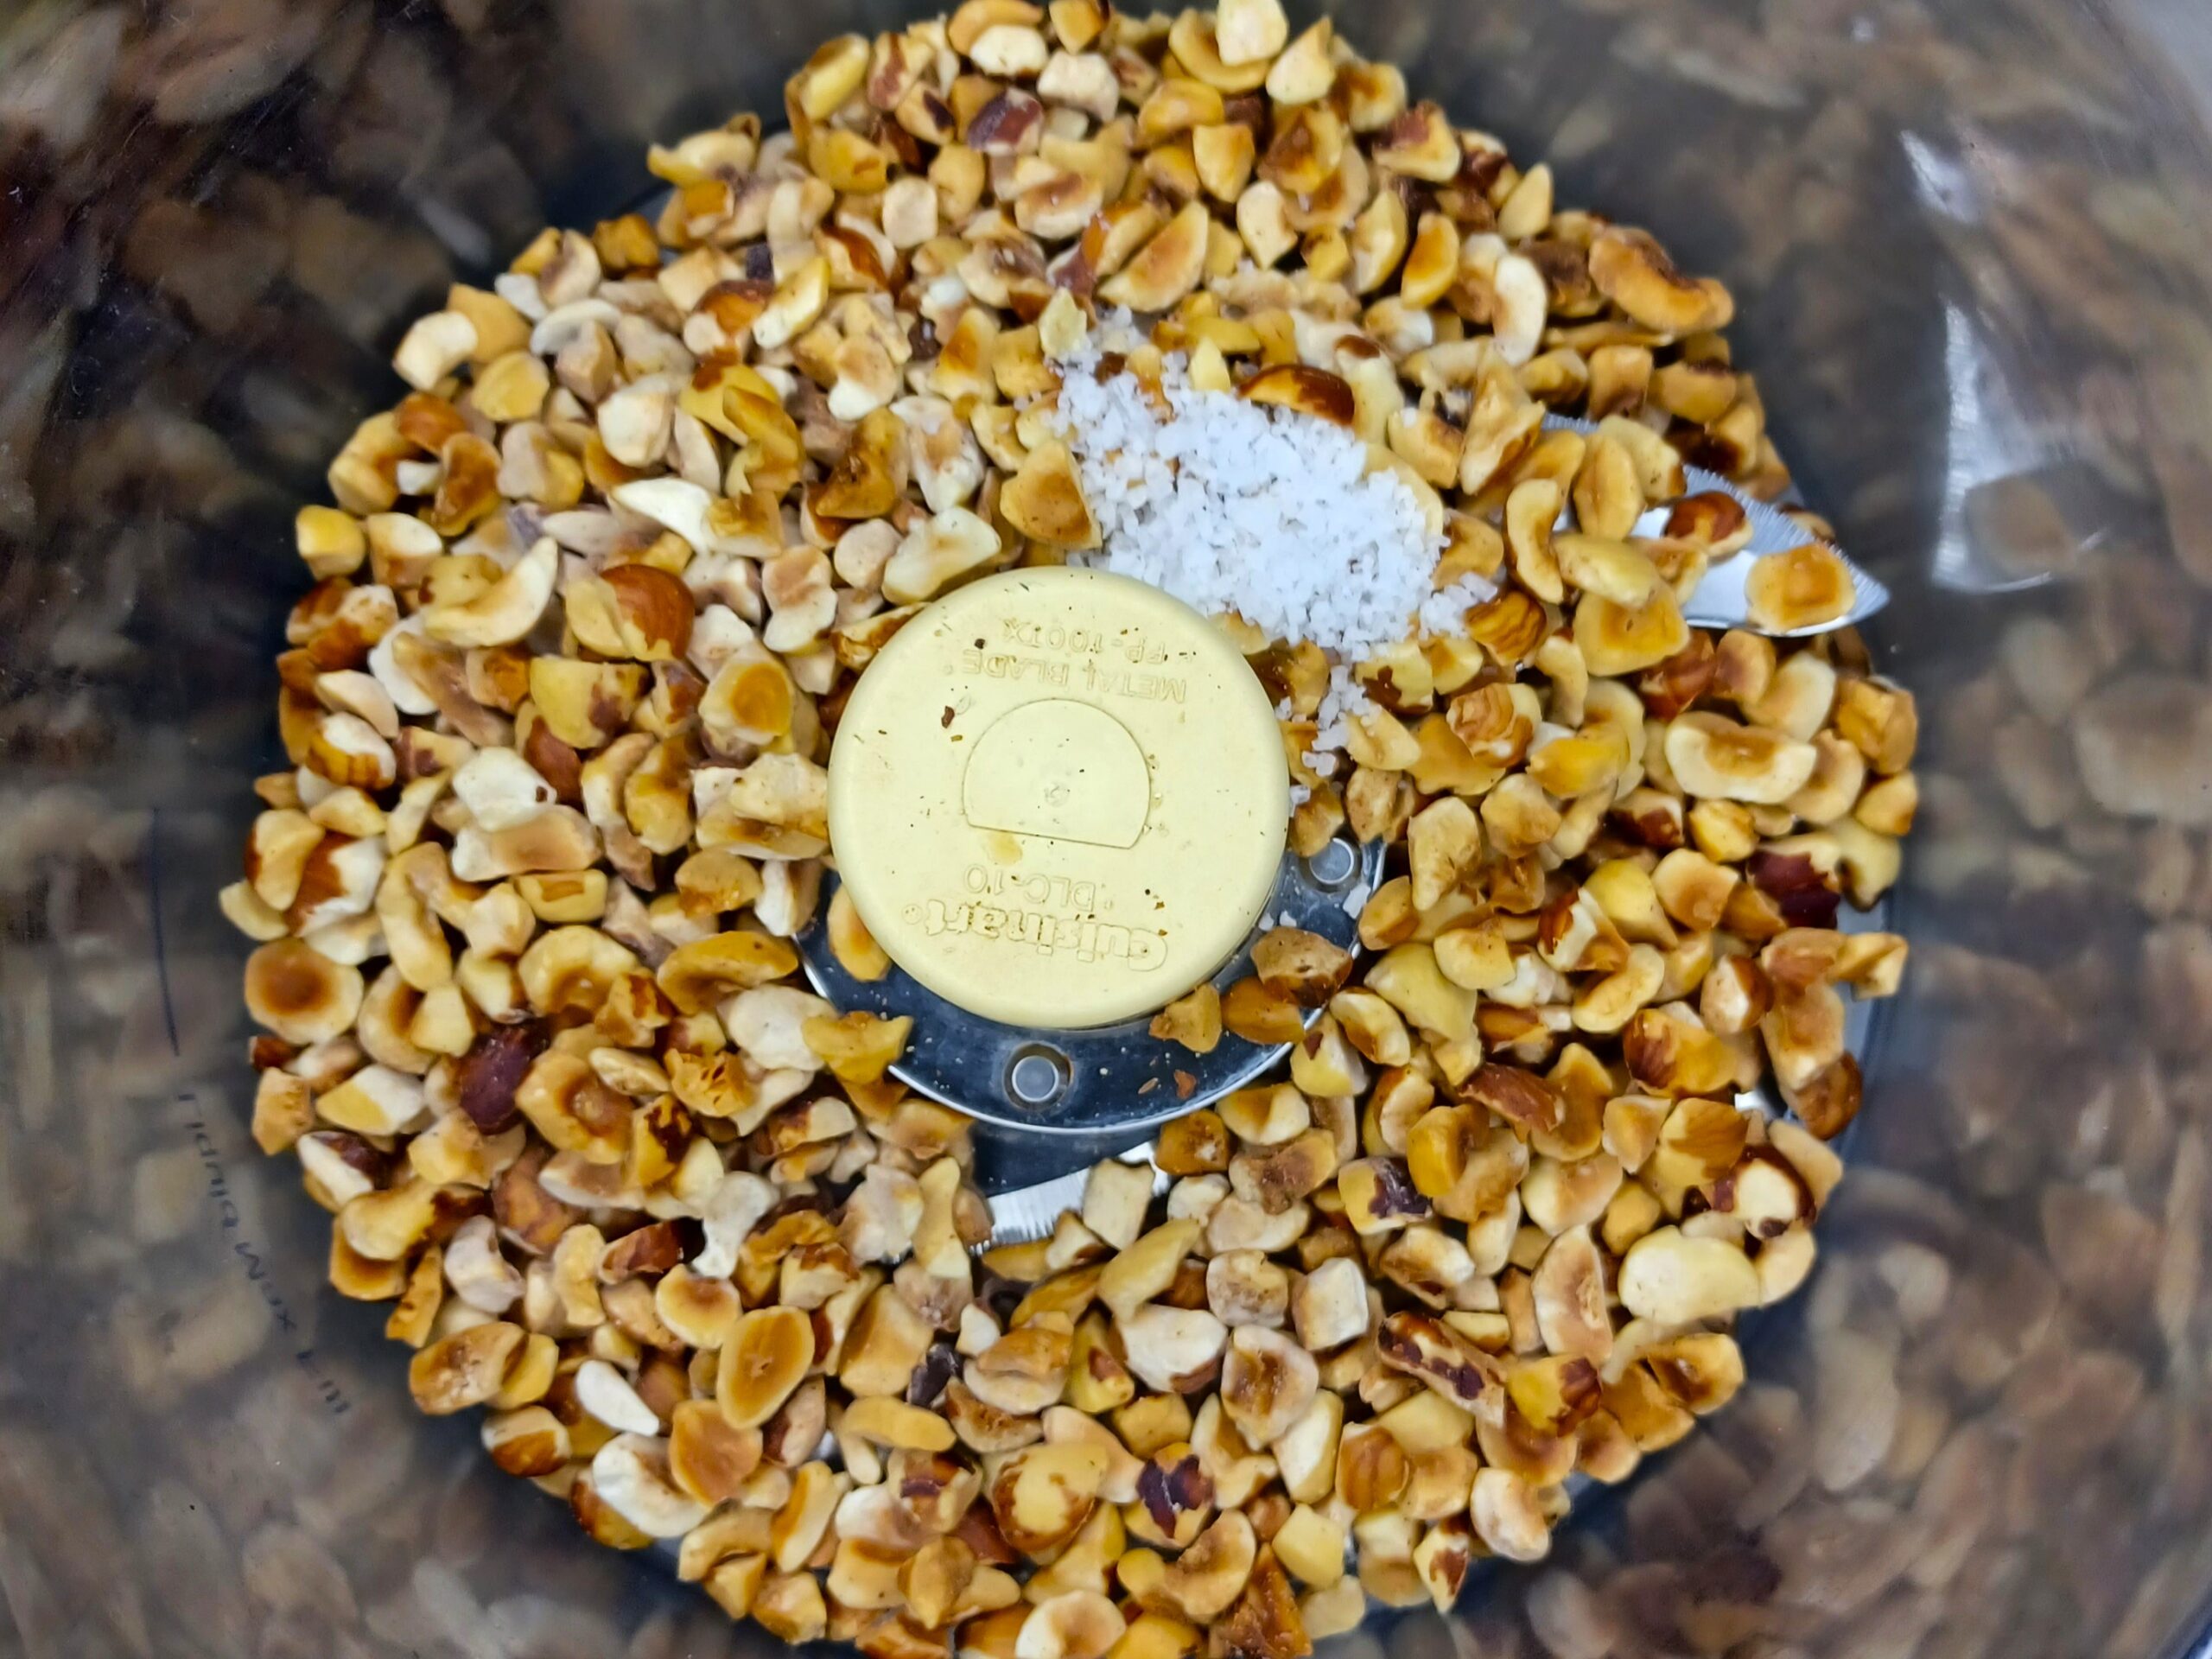
Place your hazelnuts, sugar, and salt in a food processor or high-powered blender and begin grinding. This process may take a while, and you might need to let your machine rest a few times if it gets too hot. The nuts will break up quickly, then begin to clump up as the oils start to be released. You may need to break up the clumps a few times to keep them processing. Keep going until you have the texture of a coarse nut butter.
-
MELT THE CHOCOLATE
While the nuts are grinding, chop your solid chocolate if needed (no need if you're using chocolate chips), then place it in a microwave-safe bowl. Microwave at 50% power for 20 seconds. Stir. Microwave again at 50% power for 20 seconds. Stir again. Keep doing this until your chocolate is melted, but take care not to overheat it. I like to stop microwaving before the chocolate is fully melted and let the residual heat finish melting the chocolate, while I move on to the next step.

-
ADD DRY INGREDIENTS
Continue processing the nuts and scraping down the sides of the bowl as needed. The nuts will progress from dry crumbles to clumpy/oily crumbles to (eventually) something that looks like a smooth nut butter. When you are close to a smooth nut butter, add the remaining dry ingredients: cocoa powder and xanthan gum (if using).
-
ADD WET INGREDIENTS
At this stage you should have a sweetened, chocolate, smooth nut butter, and you are ready to add the liquid ingredients. First, drizzle in the melted chocolate and pulse to combine. Then add the agave syrup and vanilla and blend again. If the mixture starts to clump up, don't worry. It will smooth out in the next step. Then add the coconut milk slowly, a little at a time. (If your coconut milk has clumpy coconut cream on top, the food processor will help incorporate it smoothly.)
Depending on the size of your food processor, you may be reaching full capacity, or approaching your "max liquid" line. At this point it's easy to transfer to a large mixing bowl and whisk in the non-dairy milk by hand. Or if you have the space, add the non-dairy milk to your food processor or blender.

-
CHILL
Transfer to a container (or keep it in the mixing bowl if you were using one) and chill in the refrigerator for 8 hours or overnight.
For a quicker chilling time, place the bowl containing your mixture in an ice bath (a larger bowl containing ice water) for a few hours. Stir the mixture occasionally. As the water in the ice bath warms up, pour off some water and add ice to keep the mixture chilling as quickly as possible.
Ideally, the mixture will be about 40 degrees when you churn it.

-
CHURN
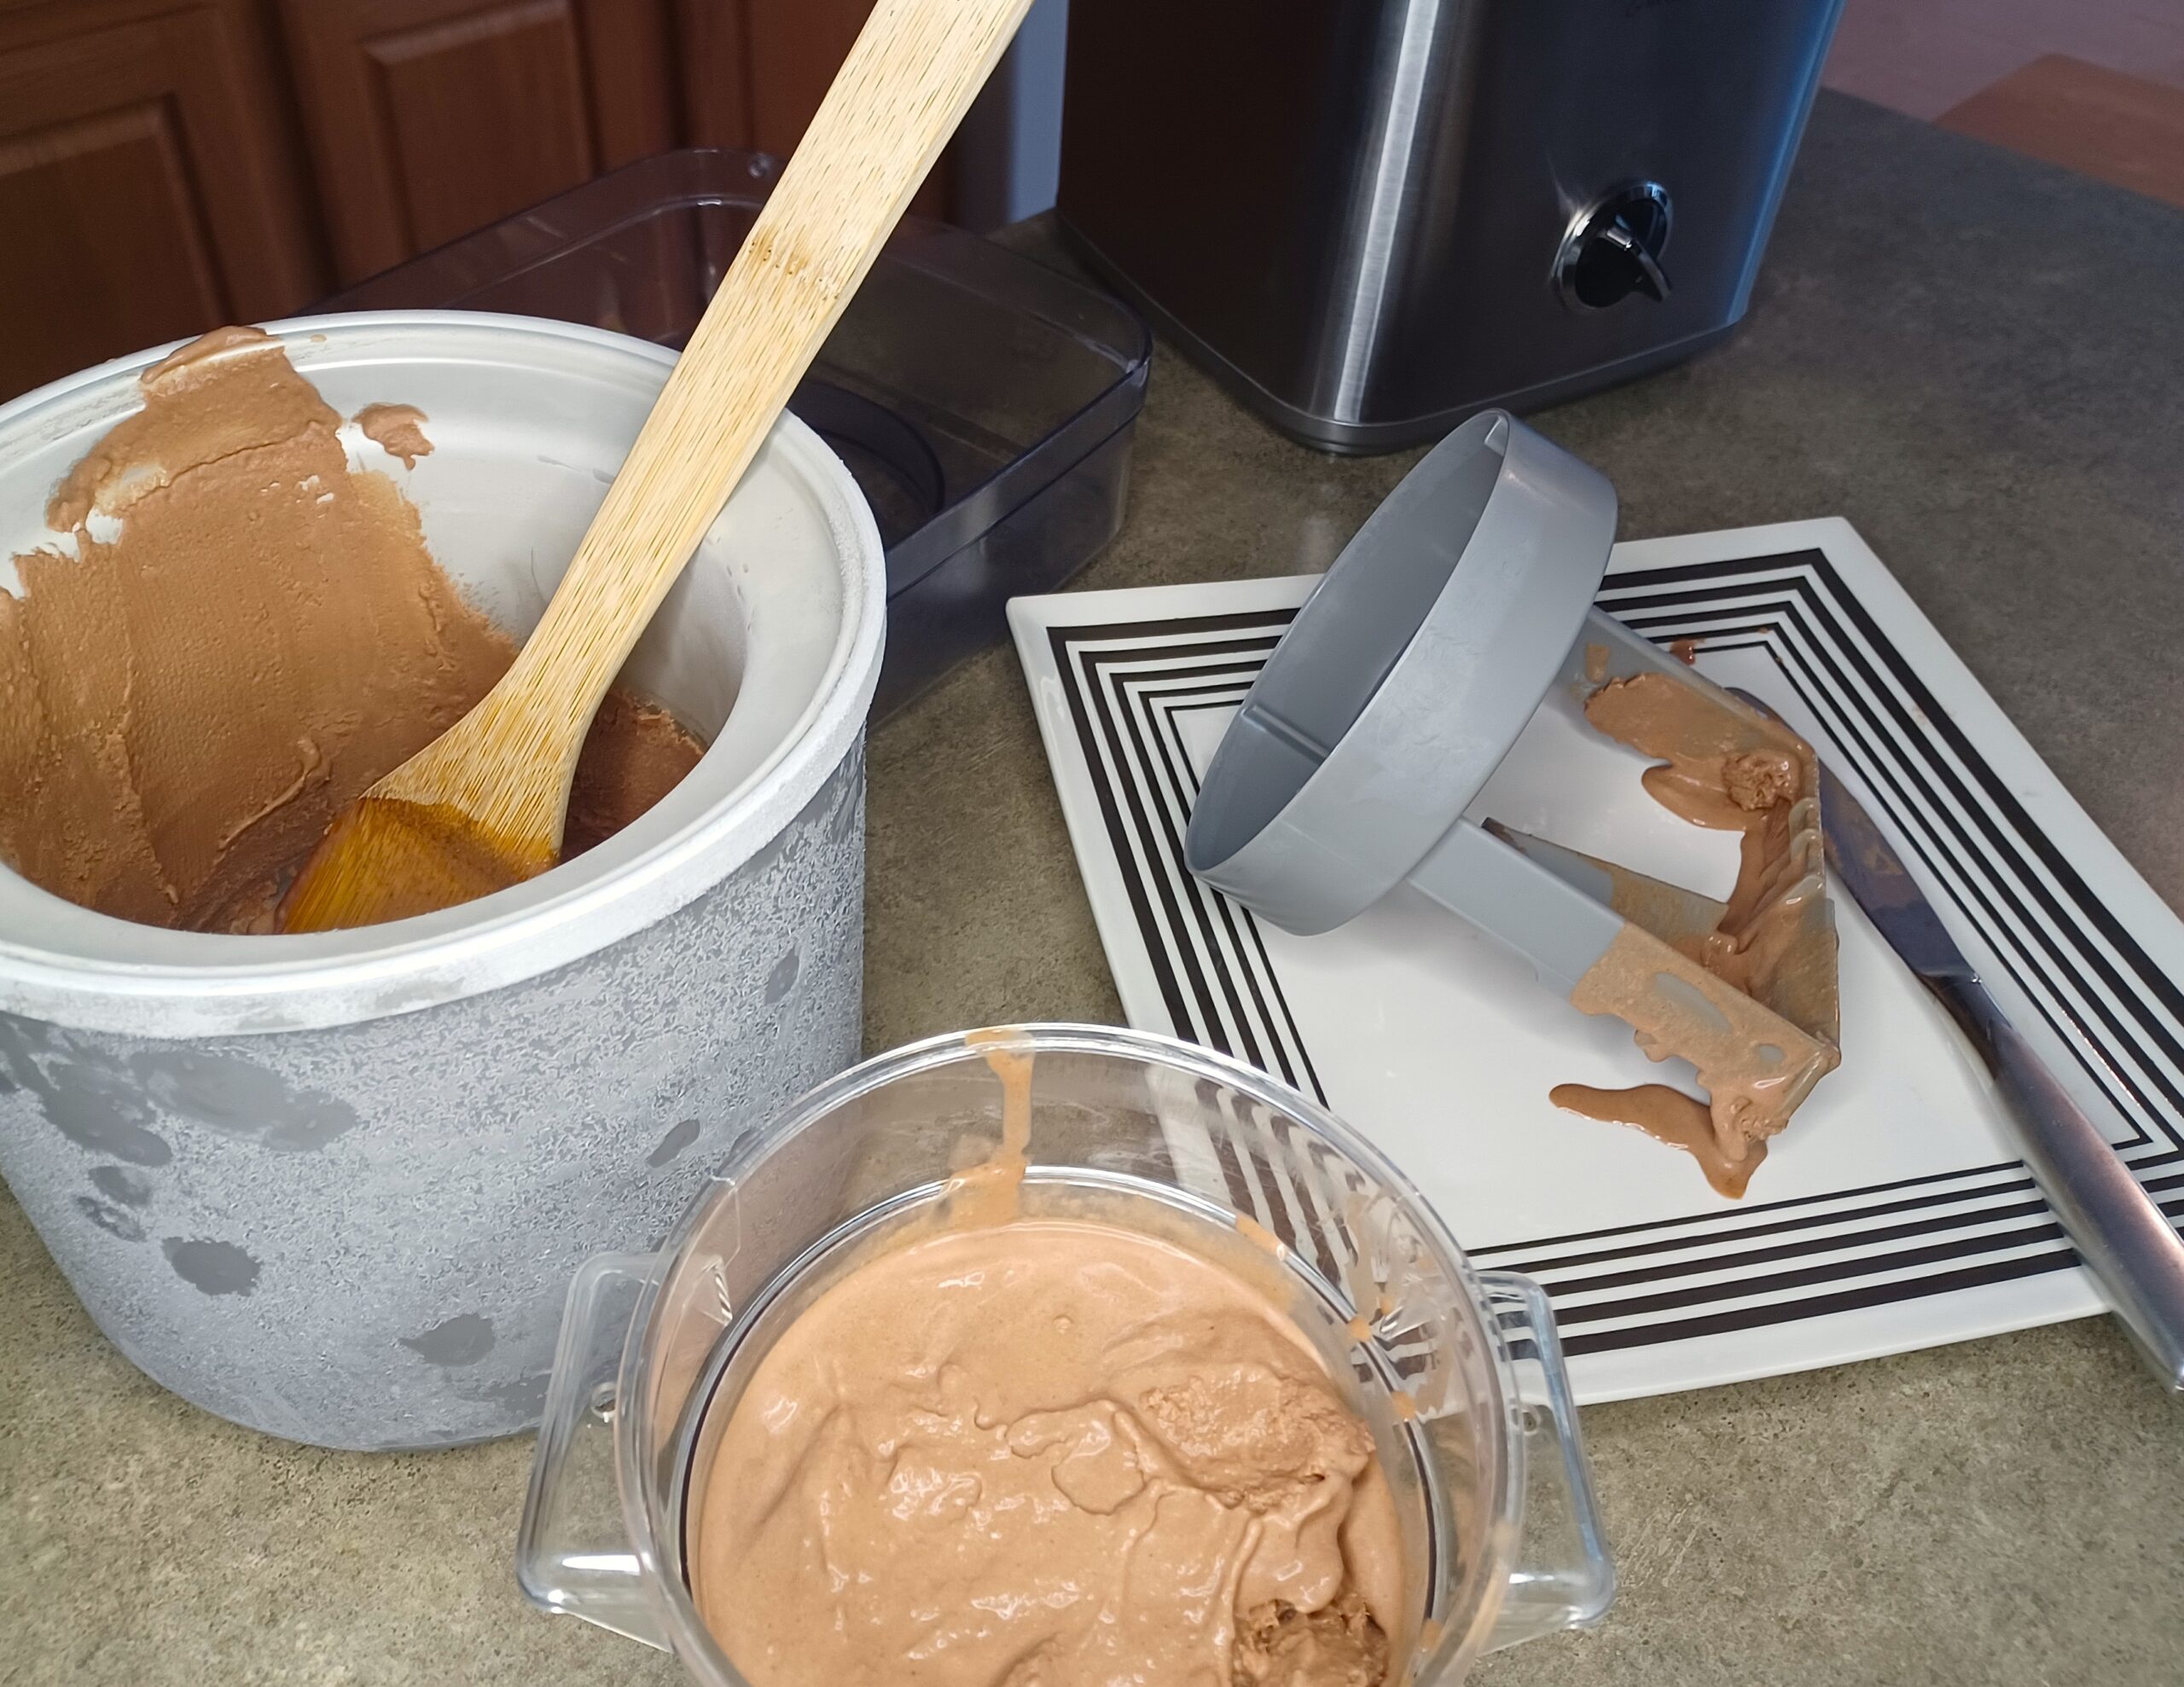
Before you start churning, set up everything you'll need to quickly transfer the ice cream from the machine into a container for freezing. I use a knife to scrape down the dasher (or paddle) and a wooden spoon to scoop out the ice cream.
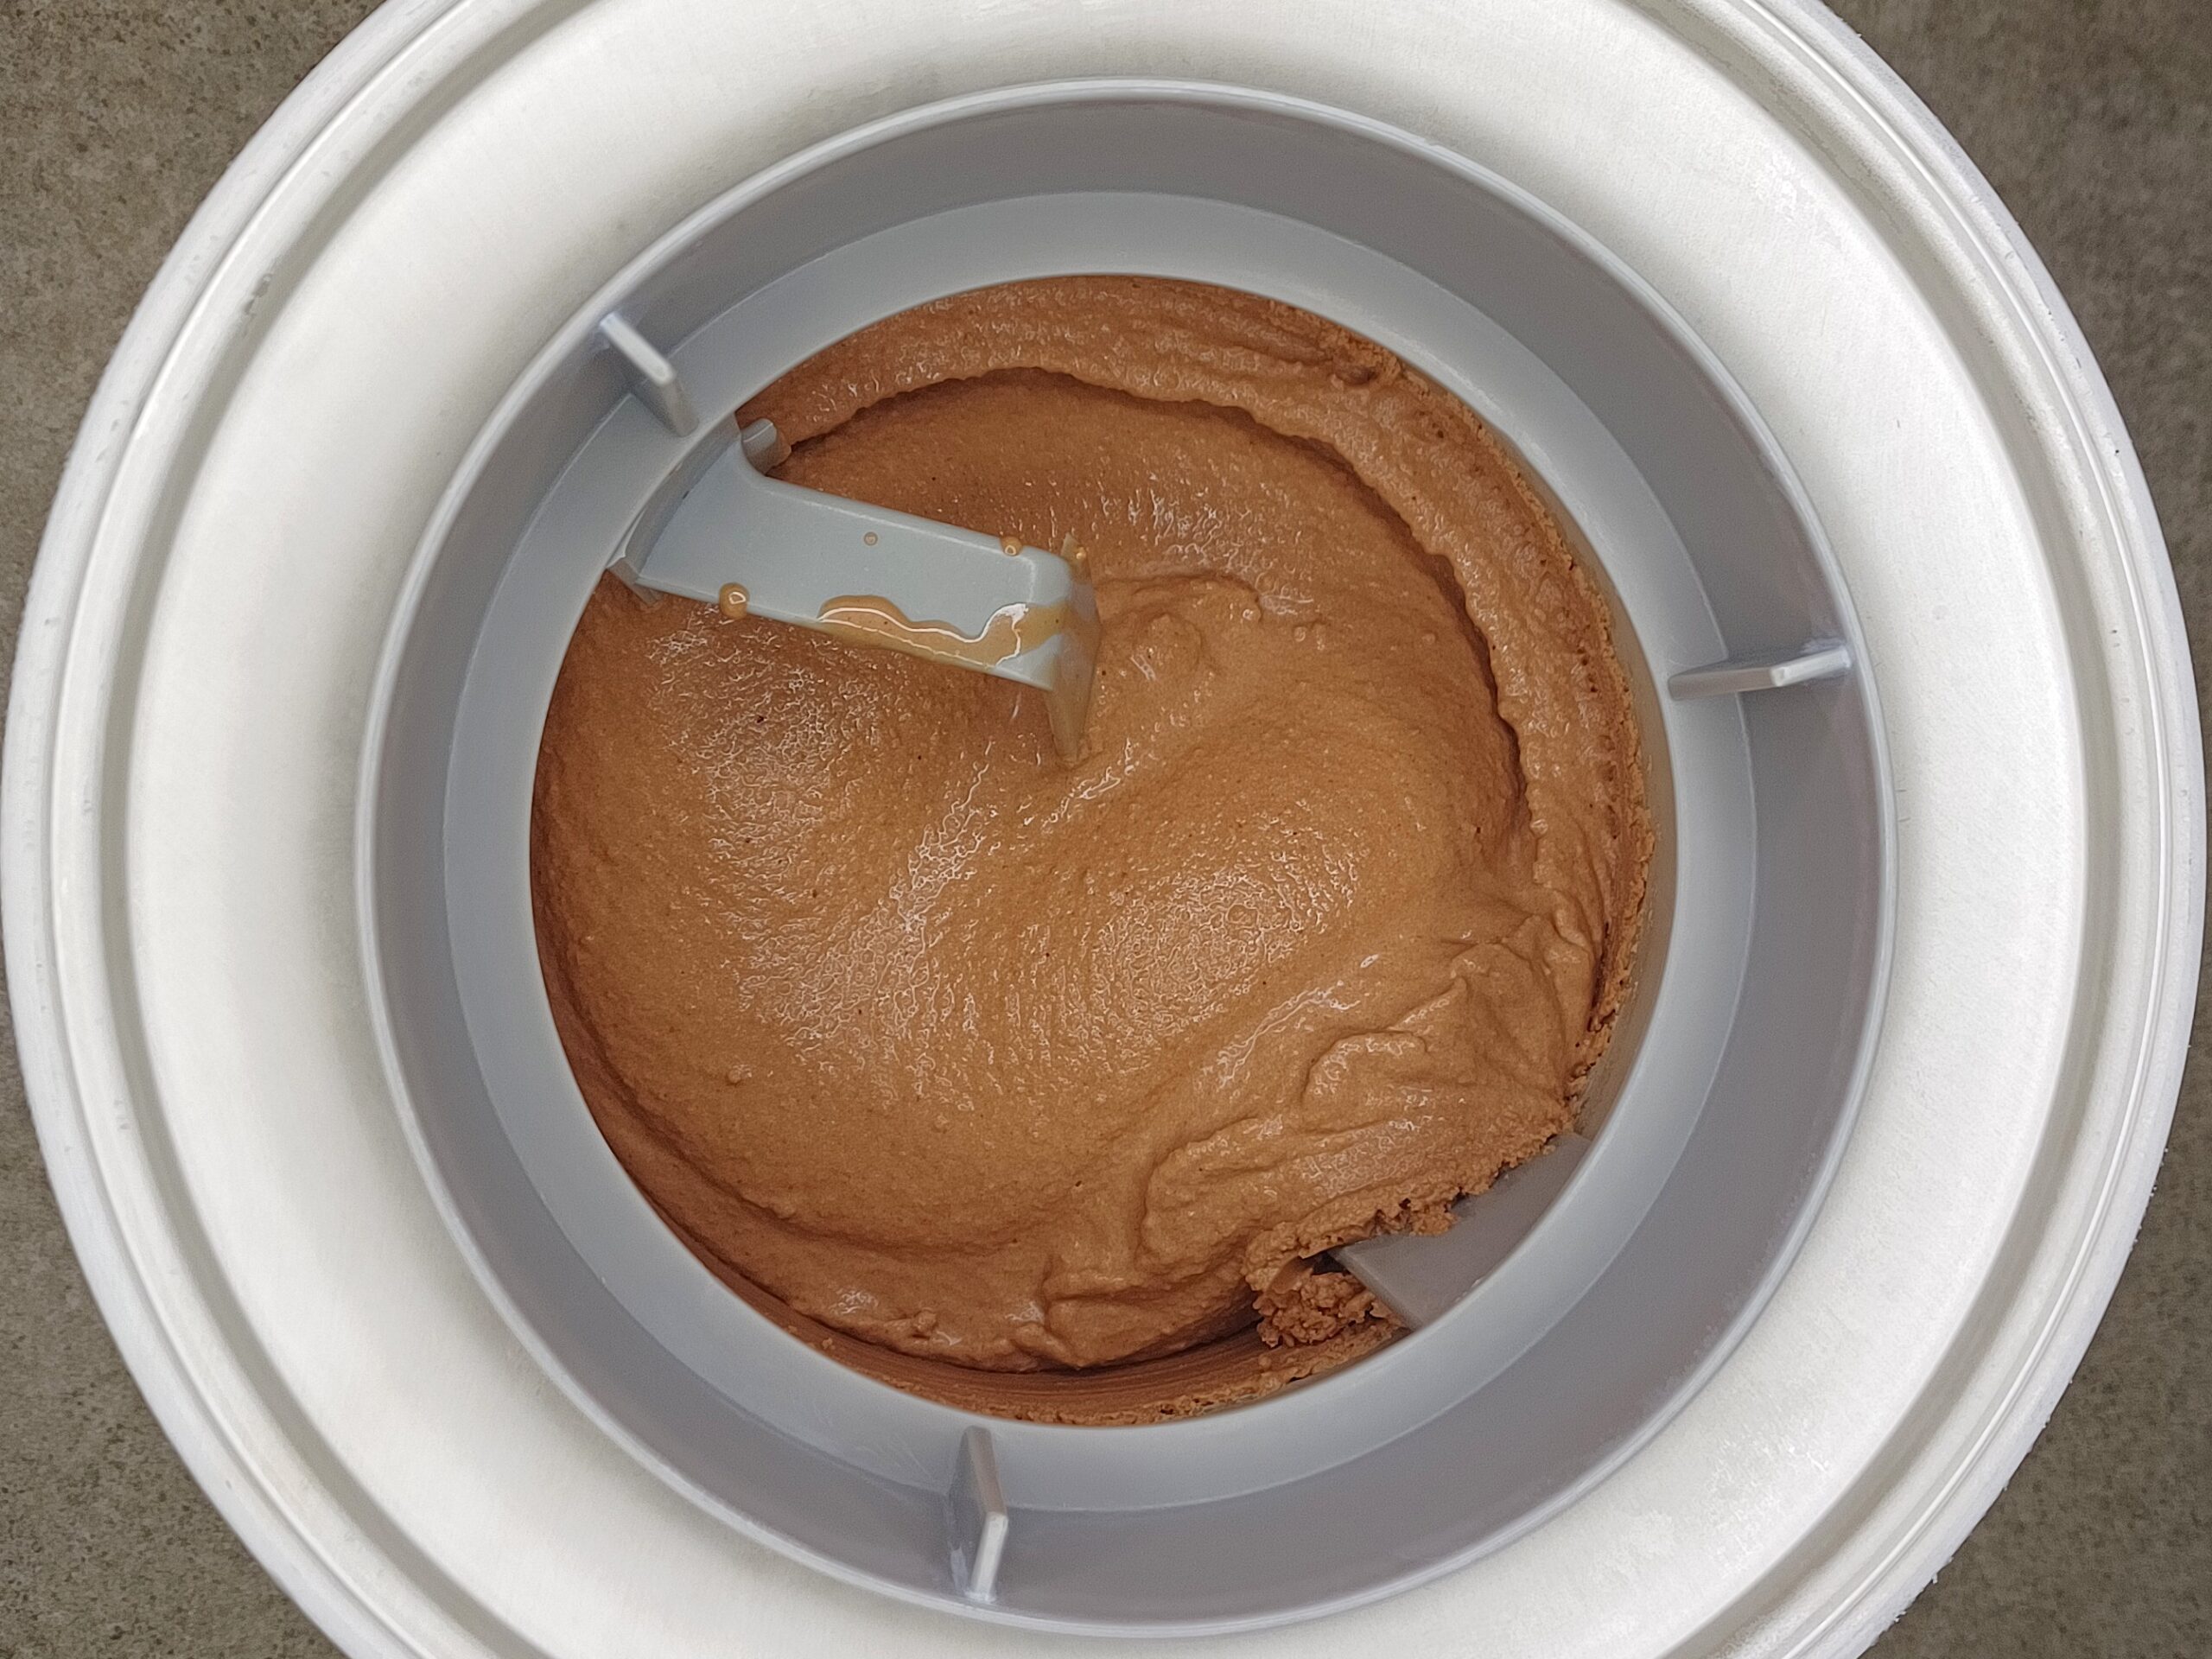
Set up your ice cream maker according to the manufacturer's directions. Pour (or scoop) your mixture into the ice cream maker and churn. This mixture is thick when it's chilled, so it will churn fast. Mine was ready in 15 minutes.
It's finished churning when it looks like soft-serve and is pulling away from the sides of the container.
-
STORE
When the ice cream has finished churning, scoop it as quickly as possible into your storage container. Cover it with plastic wrap or parchment paper, if using. (Placing a sheet of parchment paper between the container and lid will help prevent frost, or you can press plastic wrap directly onto the surface of the ice cream.) Put the container in the freezer. The ice cream will be fully firm in a few hours.
Note
Optional additions:
- 1-2 tablespoons of alcohol -- Alcohol lowers the freezing point of the mixture and makes the ice cream more scoopable straight out of the freezer. Rum would be a great choice. Whiskey would work well also.
Recommended equipment: (may include affiliate links)
- My ice cream maker (2 qt)
- Newer version of my ice cream maker (2 qt)
- Well-reviewed less expensive ice cream maker (1.5 qt)
- Insulated ice cream container
- Heat-proof spatula
- Immersion/hand blender
- Standard blender
- Ice cream scoop
- Measuring cups
Recommended ingredients: (may include affiliate links)